Videography: Self Portrait Montage Sequence |
>> 1
| 2 | 3
| 4 | 5 | 6
| 7 | |
Day 3:
Prep - Artist short film examples, Storyboard
sheets, Blank paper for them to visualize music segment, Personal
Inventory Activity sheets.
 Pre-Lunch
Activity: (in classroom) Pre-Lunch
Activity: (in classroom)
-
Determine groups and roles for self-portrait montage
-
Create production schedule for next two classes
-
Review/create list of items that need to be brought
in next class.
-
Watch artist short film examples
Post-Lunch:
Bring in items and music for next class
Reflection:
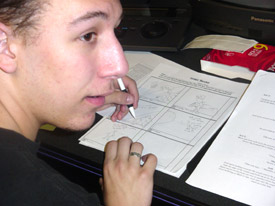
I created the Personal Inventory Sheets on the assumption
that partners may not know each other that well. Since only
one person was able to do the self-portrait, I wanted the
other partner to feel equally involved. I required each partner
to fill out the top portion on the same person and compare
notes. Since the project required communicating something
about yourself to your audience, discussing ideas with a partner
helped to bring out characteristics of each person. This really
seemed to help get the partners talking and helped me find
out their interests without directly asking them since it
was a very personal project. The biggest surprise was when
students asked if they could contrast their lives to their
partners. One group did this very successfully.
Day 4:
Prep - Tracking sheets, video equipment,
charge batteries, tags, extra paper for timelines.
Pre-Lunch Activity: (in classroom)
-
 Overview of today’s production schedule:
o Review groups that are filming
o Other people can work on timelines and finish storyboards,
finish editing invisible editing assignment.
o Anyone need to import old video? Import/find their music
segment?
o Fill out tracking sheet
o Two groups shooting at once
o Meet back in classroom after lunch
o Other groups need to be ready to shoot for next class
-
Goals for today
o Make choices about shooting based on their knowledge
of montage editing.
o Draw on their previous knowledge of film techniques
(camera movement, angles and framing)
o Create
graphic music representation
o Teams work together to shoot efficiently with full participation
from all crew.
Get everyone on task
-
Fill out and sign off on tracking sheets
-
Pass out equipment
-
Start shooting
Post-Lunch :
-
Touch base on production progress
-
Evaluate and review tasks for each student
-
Finish shooting
-
Return to classroom with equipment 10 m in. before end
of class.
Bring in items and music for next class
Reflection:
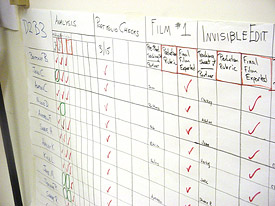
This project was our third film and mid-term progress reports
were quickly approaching. I wanted to devise a way that everyone
in the class would know what they should be working on as
well as what other classmates were doing. Thinking back to
working in a multi-media design group, we always had a production
schedule. Most recently I used electronic ones, but since
there was no common computer we could use for both classes,
I felt that a traditional marker and paper one would work.
Feedback from students at the end of the unit showed that
some students felt more comfortable knowing exactly what was
expected of them and when it was due. Introducing all the
students to project “workflow” and deadlines in
a visual and fun way helped all of us get the work done and
will be usefull knowledge in any job they do. Down the road,
I could see adding a lot more detail to each project schedule,
including organization of files and projected filming dates.
This is a good example of lesson preparation and considering
visual aids.
|
>> 1
| 2 |
3 | 4 | 5 | 6
| 7 | |
|