Artifact 1:
Stained Glass Reflection
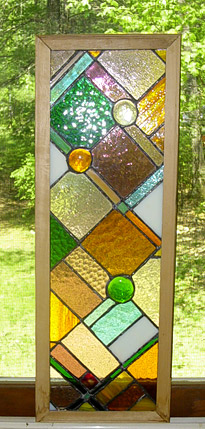 I decided to learn the art of stained glass. I have always been attracted to its graphic quality and thought that the media's inflexibility and traditional background was perfect for representing my current struggles in teaching and my current efforts to bring my creativity into the classroom. In addition, throughout the process I learned that this technique had many parallels to my own teaching philosophy, namely in challenging yourself, captivating an audience, flexibility, problem solving and even reflecting my own visual and kinesthetic learning style. I decided to learn the art of stained glass. I have always been attracted to its graphic quality and thought that the media's inflexibility and traditional background was perfect for representing my current struggles in teaching and my current efforts to bring my creativity into the classroom. In addition, throughout the process I learned that this technique had many parallels to my own teaching philosophy, namely in challenging yourself, captivating an audience, flexibility, problem solving and even reflecting my own visual and kinesthetic learning style.
As an artist, my first concepts for any work were always the most unique and original ones - ideas that stood out from the more traditional methods or designs. I was always searching for that new approach that would "knock someone's socks off". In teaching, I have noticed that when presenting information and creating curriculum I like to considered fresh or new approaches to delivering and doing it. But what differs from my artwork, is that I am rarely able to implement these ideas. In reflection, I attribute this mainly to the fact that I am a new teacher, an intern in someone's else's classroom, and because I have grown to realize that in many instances the more traditional methods may be the most effective in reaching the majority of the learners. This has been a source of recent frustration, and as a result, I feel that my experience thus far as a teacher does not reflect the creative ideas that I feel inside. I have considered that this may be because teaching in general is so intangible compared the work produced as an artist. An art teacher named Peter London said,
"As we press ourselves against or into the surface of our media, we leave our mark." (London 1989, p. 26)
I am starting to accept that for now anyway, my artist's "mark" may be seen more in my social encounters as a teacher than in the products that the students create. The design for my piece of work was formed as a visual representation how I feel about adjusting to the teaching process. In talking to some stained glass artists, two main styles seemed to emerge. One approach is very mathematical; creating a sketch that is the exact dimensions of the final product and measured precisely. All of the conceptual work would be determined upfront - including color, texture, balance and composition. The other approach is a more flexible. A sketch is also created, but it is very basic and left open to changes during the production process. In my project, I began with the hopes of mapping out a very precise solution, but I soon found myself making a number of intuitive changes and decision. I discovered after listening to a speaker on multiple intelligences, that this is an aspect of my personality type and my visual and spatial learning style. My teaching style seems to be very similar. I like to be prepared, have a clear vision of my objectives, but usually leave the middle flexible to accommodate whatever might arise.
The creation of the stained glass piece took a relatively short time; mainly because when I create art I seem to become "child-like" and can't wait to see the final product. After listening to that lecture on multiple intelligences and discovering that I am of the body kinesthetic learning style, my production process really makes sense. I not only have little patience, but also learn more through physical movement. The cuts on fingers, the shards of glass in my hair, the smell of burning metal, all contributed to the experience. The most gratifying moment was when I squeezed the last piece in. It was like putting in the last piece of the puzzle after not knowing if you had all the pieces.
In conclusion, this piece is a culmination of my frustration in teaching of having to spend more time writing and talking than feeling creative. My transition from the art world to the education system feels in many ways like 4 walls closing in on me. One being public speaking, two being requirements, three being preparation, and four being the rigid feeling of the environment. These are represented in the rectangle format of my artwork. The bright colored circles represent my creative marks in teaching. When students feel joy in their successes and share their excitement. When I reflect on all the new students I would not have otherwise met. The feeling of leaving at the end of the day knowing that you have tried to make the world a better place.
The process of creating stained glass was new and challenging. It forced me to stick to an idea for an extended period of time and concentrate on my craftsmanship. It was very controlled, yet the medium was capable of revealing a feeling of light and freedom for the future. I hope that if I continue making stained glass that my designs progress from rigid straight lines to calm curves and brighter colors - reflecting my path towards being a more experienced and creative teacher.
Artifact 2:
Commedia Del'Arte Masks 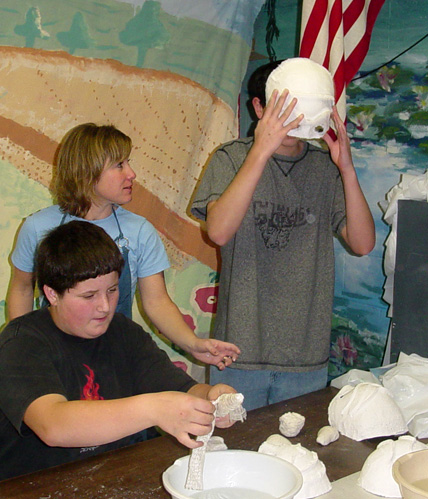
As part of the Strafford School Arts Committee, the art department was asked to create masks and backdrops for an Italian Renaissance improve-style play that would be put on for the whole school. The largest obstacle in meeting this objective was the logistics. Who would produce the 22 masks? How we will best utilize the art space to create the backdrops and store the artwork? Other things to consider were, what is the potential of artistic skill from these grades? How can I make communication easier in a multi-disciplinary project? Challenge 1: Time
Because of the rotating schedule, we would only see our older students (5-8) once every 3 days. We would not see one particular class more than a few times in the given time period. As a result, we decided to make this an intense 2-week community project for all the 6th through 8th grade classes. Students would need to understand that they were not creating the artwork for them to keep, but rather for the common goal of the school play.
Challenge 2: Space
The art classroom size at Strafford school was already under the state requirements and it was difficult enough to store the artwork of 8 grades, much less additional 3-D work. Before we could "kick off" the project, we would have to figure out a way to organize the room to maximize production and student efficiency with materials. My cooperating teacher and I discussed this in great length. Because of his experience in painting with large groups and working in his small space, we were able to organize the tables and do station teaching. We would split each class into groups based on their interest and he would be primarily in charge of the painted murals, and I would organize the mask making.
 Challenge 3: Materials and Budget Challenge 3: Materials and Budget
This play did not have an additional budget so we had to be resourceful with materials and hope to get reimbursed for some of it. We were fortunate to get donations of Latex paint for the 3 backdrop scenes, but we had to purchase the muslin and use our classroom acrylic paint and plaster strips for the masks.
Challenge 4: Mask Construction
Based on our research, there seemed to be no certain shape, material or color for the masks. We decided to create 5 unique designs based on 5 common characters in the play: Arlecchino, Zanni, Pantalone, Dottore and Capitano. In order to have control over the details of the folds in the face and large noses, we decided to use plaster strips and mold the base of the mask on the top half of the student's faces. As for color, we used the acrylic colors we had so that the masks would be uniform in color. Four of the masks would be solid colors to add contrast; we had Arlecchino the jester painted with diamond patterns of red, blue and gold. We needed about 4 masks of varying sizes for each character. I drew basic sketches on the board and showed a finished example that I made in order to help the students interpret the designs into 3-D masks. In my educational psychology class, I learned from studying Piaget that students at the stage of elementary school and early adolescence, students need concrete examples to understand abstract designs and concepts. We assigned mask making to one 6th grade class and then had the other 6th-8th grade classes create and attached the noses, face details, paint, attach felt for comfort and tie heavy duty elastic around the back of the masks.
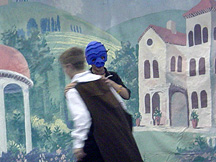 As a result of our careful planning and utilization of the resources available to us, we were able to meet the deadline date and the masks and backdrops were a wonderful success. It was an overall community effort and working with other teachers in the school increased my professional development. It was wonderful to have the opportunity to create a sketch for the landscape backdrop (seen in the first photo). I managed 7th and 8th grade students to paint my vision and add their personal touches. The masks were more of a challenge than I anticipated. The noses were sometimes heavy and hard to attach to the dried plaster base. But overall, the play was a great example of a true school community effort where students could appreciate and admire the hard effort put into the play by their classmates. As a result of our careful planning and utilization of the resources available to us, we were able to meet the deadline date and the masks and backdrops were a wonderful success. It was an overall community effort and working with other teachers in the school increased my professional development. It was wonderful to have the opportunity to create a sketch for the landscape backdrop (seen in the first photo). I managed 7th and 8th grade students to paint my vision and add their personal touches. The masks were more of a challenge than I anticipated. The noses were sometimes heavy and hard to attach to the dried plaster base. But overall, the play was a great example of a true school community effort where students could appreciate and admire the hard effort put into the play by their classmates.
Artifact 3:
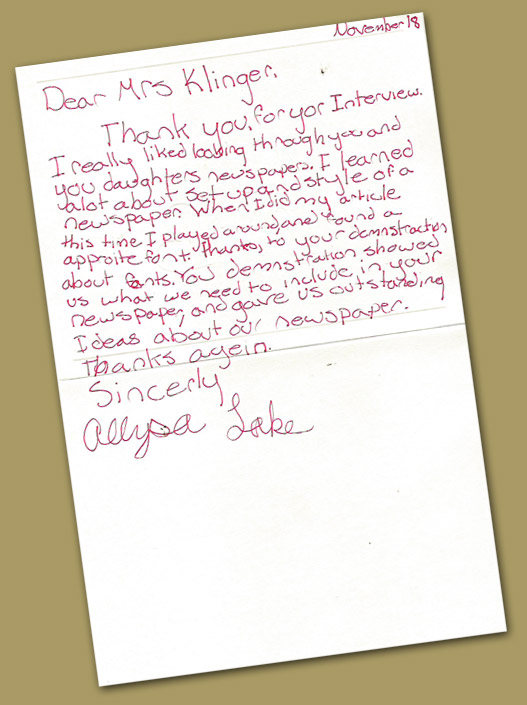
Newspaper Club Thank You Note
I was flattered to be invited to speak at the 6th grade newspaper club. It was an opportunity to share my specialized knowledge in the field of graphic arts. This was the first year of a voluntary after-school activity. I did not have a huge background in traditional newspaper typesetting, but with my experience doing on-line newsletters and advertising I knew I could provide them with a large amount of information on layout and creative writing. I wanted to take advantage of the small group atmosphere and have an interactive presentation that they will remember. My first challenge was to condense the information that I knew into material that would be useful for this group and present it within an hour timeframe. I wanted them to leave the presentation with knowledge that they could actually apply to their next newspaper. I decided to focus on 3 main areas, the process of designing a newspaper, typography and creative writing. I used the elements of a Newspaper as a way to present the information in a logical sequence.
I began the presentation with an introduction of myself and captured their attention by bringing in my laptop and walking them through my on-line portfolio of design-work. I also showed them some of the software used in the professional world and their advantages. I shared the high rates that designers have the potential of getting which peaked their interest.
After my introduction, I wanted to make the presentation more hands-on. I brought in an example of a newsletter created by the newspaper club in a surrounding school district and passed it around. My daughter was involved in starting this newspaper and I shared some of her ideas that were successful, as well as ones that needed improvement and asked for their thought. I also brought in a newspaper labeled with the vocabulary terms associated with a newspaper and had them try to guess which section they related to. The rest of the presentation was made up of two main activities that gave them a mini-lesson in choosing appropriate fonts and generating ideas for articles and catchy headlines.
During the presentation, the students surprised me with a question and answer period. They gave me an "official interview" and it was nice that I could let them "run the show." About a week later, I was handed a stack of thank you notes by one of the students from the club. It was so unexpected and reading them reaffirmed my choice in becoming an art teacher. I would love to share them all because their comments were all so valuable, but I included one which I chose because the student gave a clear example of meeting one of my objectives for doing the presentation. The student wrote, "I learned a lot about set up and style of a newspaper. When I did my article this time, I played around and found an appropriate font thanks to your demonstration about fonts." From all the responses, it seems that the presentation was a successes and not only helped my professional development and learning, but increased student knowledge in the process.
Artifact 4:
Apple Book Comparison
The apple book lesson idea was inspired by my Secondary Art Methods course. We learned that book making was a hot topic in art rooms today and we made our own books using various bindings methods. In pairs, we brainstormed and generated a long list of what content could go into the books that students made. One idea was sketching an apple while it was being eaten. I thought this drawing idea would good follow-up activity to my 6th grade unit on bottle design. In that unit, the students focused on learning about package design and how to create an innovative bottle shape. I noticed that when they were coloring their bottles to make them look more 3-dimensional, that they had difficulty choosing colors for the shading and highlights. I thought this project would give them the opportunity to explore complementary colors for shading dark areas of an object. Since the drawings would be sequential and could be as many as a dozen, constructing a book for the final drawings was a logical solution. It was also a lesson that would make a student feel successful if they did not master the skill of gradation. It allowed for creativity with color and shape and decoration of the book. I knew that there were a few students with IEP's that had a difficult time with gradations of their bottles. This lesson was flexible enough that those students could use watercolor paint or choose a different subject for their book.
What I learned as a teacher from this project was the power that concrete examples can have on students. As a teacher, you have to make sure you know your objectives before you show any examples. If you objective is maximum creativity and exploration so that the student's problem solve to find an answer, it might be best to no show an example of what the finished project might look like. If the students need to follow a sequence of directions in order to get a product, it is beneficial to show them a concrete example of the finished work in addition to visuals of steps along the way.
I have three 6th grade classes that meet on a 3-day rotation. When I first presented this project to the first class I had not done an example. I set the first day up as a one-day exploration of the form of an apple to be done in as many quick sketches as they needed to learn about how the apple changes shape when it is eaten. After that class, I reflected on the sketches. I saw that the students seem to frequently erase, seeking how to accurately draw the form. I also noticed that many of the sketches were very inconsistent with size and placement on each page. On the second and third day of the lesson I told the class to color the apples with any color, but use the color's complement for the shading. I had them draw on their previous knowledge of coloring the bottles in order to make them look 3-dimensional with highlights and shading. On the fourth day of the lesson, I showed them how to bind the book and had them come up with a unique cover design.
In the second class, I tried a different approach. I showed them an example of one stage of an apple that I colored with red and green complementary colors. I showed the apple as one page in a bound book. I also showed them some of the apples drawing that the other class did.
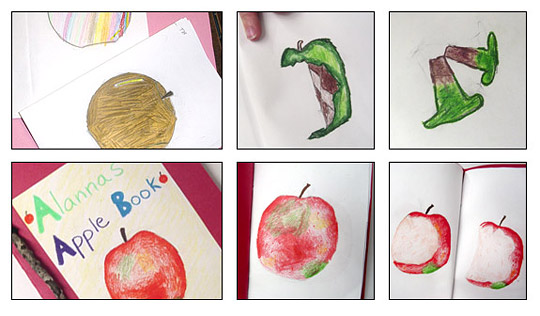
In the photo I included, I show a comparison of examples from the two different classes. Overall, the bookbinding came out very similar. Some were more creative then others, but they all basically did a drawing on the cover that related to the inside apple content in some way. It was the drawing of the apples that distinguished the two classes. The first class seemed to use their imagination more with shape and color but struggled with how to draw the core within the apple.
There were many examples where people tried to turn the series of sketches into a story. For example, the cover would have a tree and after the last page where the core was left, it would show the seeds falling out, or the core breaking in half. In the second class, the apples came out much more realistic looking in size, color and shape. The covers of the books seemed to be about their process of drawing instead of a story about an apple. They all chose red for their book cover.
I am not sure if I lead them in these two directions with my comments and feedback during the class, but I do know that having a concrete example really made an impact on the student's work. If I had show my finished example to the first class, I think that some of the students with IEP would have been intimidated by the realism and skill of the project and not been confident enough to do it. By not giving them a set expectation of the finished product, all the students were able to sketch in a method comfortable for them and chose colors beyond red and green. Even a student with MR completed the sketches and then went on to gradated a subject of his choice - a flamingo. Another student with MR colored these wonderful golden apples. As a teacher, I know that in some cases I want the students to observe and replicate a process. In other cases, it is better to let them try to solve the problem on their own. I wonder how many lessons would have been different if the students had not seen a concrete example first. Would they have meant more to them as an artist? Would they have been more creative? This lesson was a great reminder of having my objectives clearly thought out and then teaching a method that will meet those objectives.
Artifact 5:
Graphic Organizer
Ever since I took the Reading Through the Content Areas class, I have been a huge fan of graphic organizers. I think very visually and it really helps me organize my thoughts. I use graphic organizers as much as possible in my art classes. I feel it really helps students walk through the initial concept planning and by being able to write it down, I am able to help them as a teacher because I know their thinking process. There has been a strong movement to bring literacy into all classrooms. I feel that it is part of my responsibility as an art teacher to inspire students to document their feelings and ideas. By doing this, they will hopefully increase their reading and writing skills and connect how they can use these tools taught in school in their everyday lives.
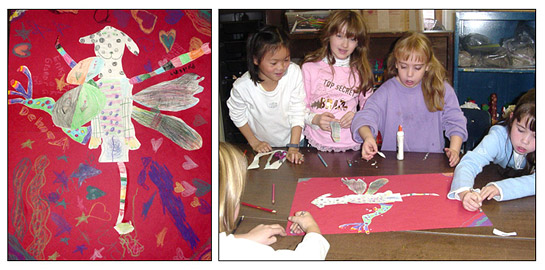
I have included in my portfolio and example of a graphic organizer that 7th grade students used during a group book art project. Because of the nature of the group project, it was necessary for students to organize the tasks that needed to be completed and let me know what materials they will be using. Because of time constraints, each group had only one class period to discuss their idea and have a plan of production by the end of class. Having an organizer to fill out was a great way to orchestrate learning in a group setting. Group work can be very difficult at this age. There is a lot of competition and students are just used to artwork being a personal adventure. If a student doesn't agree with a person's idea, the person can take this as a personal attack. To set a group project up for success, it is critical that there is a good personality mix in the group and that each person feels that they are giving an equal contribution to the final artwork. In order to separate the class into groups that have a better chance of being objective and working well together, I tried to divide the students into groups of people that they don't ordinarily hang out with. I feel that if a person is working with their best friends, they are more likely to either bond and disregard other members, or disagree because they take things more personally. In my art classroom, I do not have assigned seats. I used this to my advantage to see who were friends. Then I labeled the bottom of the chairs with different colors and made sure that people sitting near each other were separated into different groups.
Filling out the organizer forced a community effort. Only by starting at the center of the page and coming to agreement on the basic statement or message, they could then move on the assigning individual roles and tasks. The organizer allowed them to visually see how each task group was working to meet a common goal. The organizer also allowed me as a teacher to keep tract of what each student's responsibility was in the group and keep them on task. I also was able to see any potential issues and come up with an alternate plan that would meet their objective.
I've used graphic organizers for having students create and choose a final thumbnail, for self-assessment and for giving feedback. I find that at the elementary level, there are many students with IEP's that call for sequential instructions and graphic organizers help them feel that they are writing to create and plan artwork instead of writing to taking notes. In art, planning is half the battle, and if I can get them in the habit in documenting their thought processes, they will learn more about the way they think and because more efficient planners.
Artifact 6:
Group Species Project
In my educational philosophy class we learned about organizing the classroom into different models to facilitate learning. We sat in groups and instead of being lectured to, we were required to collaborate with others and communicate to solve problems. Communicating with other people is essential for students to grow up and function successfully in the world. Many professions have employees that work in team environments. Group learning can be a beneficial experience in art class, especially when students are at a very intrapersonal age. Elementary school children have such an imagination. By putting a few heads together, students can come up with a design beyond the scope of what one person could even image. It is not common that group projects are done in the art classroom. It promotes a different dynamic, which depends largely on classroom community. By inventing their own species of animals, students strengthened group communication, problem solving, cutting and color gradation skills. It reinforces problems solving and channels their energy into a cohesive 2-Dimensional design that they can use to communicate their ideas to others.
At this young age, children are used to a group setting, but not necessarily working that way. In any group project, I find that it is helpful to separate the students into groups that they aren't normally used to working with. The size of the group can also be a factor in the successes of the project. Anything less than four or over 6 seems to add a different dynamic. With only 3 students, one can be easily left out. Any more than 6 and communication can be difficult when too many people are talking at once. For this 2nd grade project, I decided on groups 5. I was prepared to assign each person their own task by having a cup on each table with 5 slips of paper. Each slip of paper had a different body part that each student would be in charge of drawing. This process allowed the group the structure needed to get started assigned each member an equal contribution to the project. Only after each person completed their task were they able to work on the background. This motivated students to finish their piece so that they could help in assembling the final group artwork.
I believe it is part of human nature to want to impress other people. When a project requires students to be a part of another persons work, students seem to raise their motivation to do well. I believe that because of this, students also feel an increased sense of accomplishment when they can share their ideas with others and make them happy. Group projects can be difficult to plan, but a format that teaches social skills as well as art skills.
Artifact 7:
Choice Poster (front and back)
In my art methods courses, most of the controversy and discussion seemed to center around the question, "Is the Artist Workshop format a valid and realistic way to teach in public schools? Although I agree theory on an Artist Workshop or choice-based classroom, I found it hard to implement in the 45-minute time block we had for all of our classes. I did try at every opportunity to develop and teach lessons that promoted and celebrated student diversity and personal ideas. This philosophy can be seen throughout this teaching portfolio. But I only had a few instances at the elementary or middle school level that I was able to have the students write about their artistic process and give feedback. At the high school level, students we used written critiques to inspire students to write about their work. With the younger children, it seemed more difficult to incorporate. On many days it was hard enough to have time to review the lesson, give a quick demonstration on materials and still have time for work and clean-up. But, the Artist Workshop format is something that I truly believe in and will make every effort to implement in my classroom.
Having students write during the process of creating artwork allows me get to know what my students are thinking and what interests them. During the book unit, the students were able to replicate the book making process and use their creativity with design and color to make them unique. Now I wanted them to know how to generate their own idea if one is not given to them and present it in a poster format. From my experience teaching high school art, I believe it is very important for young students to know tools for developing their ideas.
Because of limitations outside my control, I did not have the space for each student to actually do a finished poster. But I still wanted them to walk through the process and watch them make choices on subject, composition and medium. I created criteria for the project that were appropriate for my objectives and for my students. I wanted to create a project that was very open, but required them to go through a creative process and document their steps. In this way, I would be able to give them feedback and provide questions that would engage their critical thinking skills. If they completed the process, they would receive a plus for a grade. If they did not attempt the writing process, they received a minus. A check or check-plus was somewhere in the middle.
I began the poster unit by giving the students a central question, "Do we need to live in a world divided? Where are you?" Then I presented the students with two tools for generating ideas. I first showed them a brainstorming technique and then on another day a slide show of student poster work. With these tools, students were asked to do 5 things.
1. Write your position on an issue about division in the world.
2. Think of images or symbols you can use to represent this issue. If it is a problem, is there a way to illustrate a solution?
3. Draw a sketch of what your poster might look like.
4. What medium would you use to make the final poster and why?
5. Now review what you have written. Would you change anything? Could you use any elements or principles of design to make your poster message stronger?
I have included an example of one student's solution. I chose one where I felt the student completed the creative process. Because this was relatively new to them, many students found it very difficult to express their art in words. As a teacher, I found even the smallest comments very knowledgeable about that person's creative process. In this poster example, the person begins by writing about how they feel about an issue. In the brainstorming exercise, I had students examine their thoughts on people, places, things and ideas. These are the same topics used in the language arts for writing composition. I had them list 4 things for each page that meant something to them. This person probably listed their love for animals. Then I told them to try to relate their thoughts to an issue about being divided in the world. Animal Rights is a common issue and this student used this issue to express their feelings. By adding the angel, the student not only presented a problem, but also gave a positive message about solving it. Even though people may think angels aren't real, by adding the title "Dreams," the student presents her illustration as a hope. The student goes on to complete the process by reviewing her work and seeing how she could apply artistic techniques to make it stronger.
If the student had not written about her artwork, I might not have understood her significant message about equality. It also gave me an opportunity to help the student reach her potential by offering suggestions about mediums to try. There were so many posters that taught me so much about my students and their interests. There would have been so many advantages to doing this unit earlier in the year.
Artifact 8:
Stamps and Identity Stationary
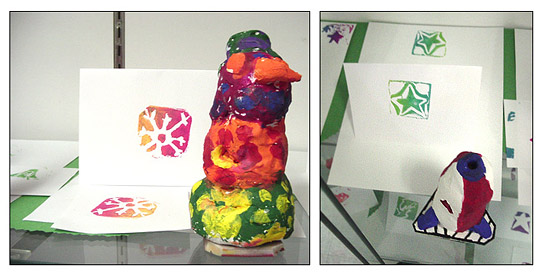
It is so important for students to learn how history influences the things we do today. Many artistic methods have been around for many years and we have our ancestors to thank for giving us a culture that is now rich in ideas and techniques. Although they say there is no such think as a "new idea," artists can combine ideas to make new artwork. I was required to do a 6th grade sculpture lesson based on art history for my Elementary Methods art class. I have always been attracted to the bright colors, shapes and materials used in African cultures. I was inspired by a lesson my cooperating teacher did with his students, called Adinkra Clothes. After researching this West African tribe, I found that the stamps that they used to make these clothes were very sculptural. They were carved from gourds and had bamboo handles. Although we did not have these materials available in our art room, I knew I could find substitutions and make the project our own. We began by discussing how stamps have been used historically to sign an artist's name. I had students come up with a theme that they would use for their stamp and handle. This theme should be a symbol or logo that represents their personality. Our first task was creating the stamp handles out of clay. As an inexperience teacher, I was not thinking that this would take more than a day or so. Well, I was wrong. After a day of watching students handle the clay as if it was play-dough, I was forced to make a decision about how much emphasis I should put on clay construction. After finding out from my cooperating teacher that the students have used several construction methods in the past, I decided that I could use this lesson as a teaching tool for the methods of clay construction. Since a student could not complete their stamp without a handle, it was necessary for students to construct handles that would break or blow up in the kiln. That would be devastating.
As a solution, I spent a day with each class exploring the medium of clay. In one class I separated the class into 3 groups and had them form 3 different shapes. Then I went to each table, had them chose what they thought was the best construction, and problem solve why. In the end, we came up with 3 methods that worked the best - coil, slab and pinch. In the two other classes, I just had them practice these three methods and understand the importance of scoring and having a good joint. Both approaches seem to arm the students with the knowledge needed to complete the project. We had a few casualties on the way to the kiln, but overall it was very successful.
While the handles were being fired, the students worked on their stamps. I showed them examples of stamps on the Adinkra clothes and had them decipher between a positive and negative stamp image. After they finished their stamps, they assembled their sculptural piece. I showed them how to ink the stamps using "rainbow runs" with multiple colors. I also told them that they could easily do this at home with watercolor markers. I finished off the unit by having the students print Corporate Identity pieces. I incorporate my specialized knowledge of graphic design and brought in my portfolio to show them examples. Students that were ahead in the class were able to practice putting their personal information on letterhead paper. The combination of the stamps and identity pieces made a wonderful display. It was a display that made everyone feel like an artist independent of artistic skill and ability level. In the example shown, I included work from a general education student and one with special needs. Can you tell the difference?
Artifact 9:
Multiple Intelligences - Group Book Rubric
Because my teaching philosophy is primarily student-based, knowledge on how to teach to students with multiple intelligences is critical to my teaching. I conducted an action research project on this topic and used my 7th grade to collect data to prove my theories. What I found out was that there is an even balance between learning styles in any given class and as a teacher; I need to consider this when planning any unit. During this book-making unit, I focused on using teaching methods that were mainly visual, bodily kinesthetic and auditory (or intrapersonal). I also had students take a learning styles quiz to find out which were their strongest of those 3 intelligences.
By doing this process, my objective was to make more students aware of people learn information differently and by knowing that, a person can learn more efficiently. My objective was not to force them to use their strongest learning style, but rather to show them that a balance of using all learning styles is the best way to retain information. The data I collected in my colloquium supported this theory. At the end of the unit I told the students I explained my objectives to my students and shared how I thought they could use this information to help themselves. I encouraged them to try to learn in new ways even if they sometimes feel uncomfortable at first.
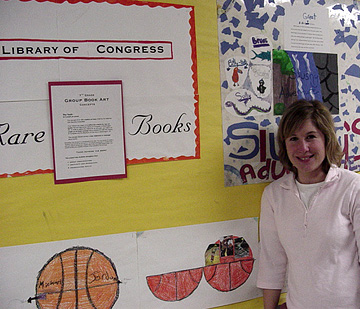
One of the lessons in the book unit was a group art book presentation. Since art usually tends to be an individual effort, this was a strange and new experience for many of the students. From the feedback I received, it seemed that they all recognized the obstacles in doing group work but also realized that it was a part of their learning. Since the 7th grade classes were very large in a very small art room space, I relied a lot on classroom community to keep control of the noise and activity in the classroom. I also evaluated the project based more on process and concept than on production and final product. My decision was based on limitations of materials and time. Some of the students still needed to create a tangible product in order to express their concept. 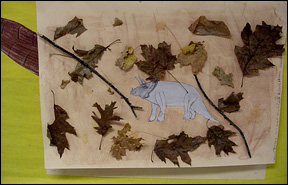 For example, one group wanted to show how books have been around for a long time and were created by the earth. To convey their idea, they went outside and gathered leaves and sticks to be part of their prototype design. They also added a creative idea of adding a dinosaur tail as a bookmark. Other groups were comfortable just drawing a sketch and explaining their concept during the presentation. One example that was a big hit was the concept, "books don't have to be square." They sketch a basketball book that would be in the shape of a sphere and open to have rotating images inside. Both approaches, a finished example and sketch, seemed to be successful to get their idea across to their audience. From this, they can learn that there is not one right way to do something. For example, one group wanted to show how books have been around for a long time and were created by the earth. To convey their idea, they went outside and gathered leaves and sticks to be part of their prototype design. They also added a creative idea of adding a dinosaur tail as a bookmark. Other groups were comfortable just drawing a sketch and explaining their concept during the presentation. One example that was a big hit was the concept, "books don't have to be square." They sketch a basketball book that would be in the shape of a sphere and open to have rotating images inside. Both approaches, a finished example and sketch, seemed to be successful to get their idea across to their audience. From this, they can learn that there is not one right way to do something.
 Giving them a rubric that assessed not only their own behavior, but also the behavior of others in the class, was a tool to help them learn from their group experience. Giving them a rubric that assessed not only their own behavior, but also the behavior of others in the class, was a tool to help them learn from their group experience.
I have included an example of the rubric that was given to each student. The first two sections gave the student a chance to assess the other presentations in the class and the other members of their group. I found that many students took this opportunity to honestly evaluate the effort and conduct of their peers. The last section was the student's self-assessment. I was amazed to see the growth of a few of the students. They were able to honestly say that they didn't contribute as much as they could have and I admired their objectivity.
By including projects in the book unit that strengthened student's communication, visual and hands-on skills, I was able to reach multiple learning styles instead of just one. I believe that having a balance is key to reaching all the students because everyone learns differently. Using rubrics that shows a student their strengths and weaknesses is valuable, but only if the teacher reinforces that it is OK not to be strong in all areas. Lets face it, we all aren't social creatures and that's OK. A fair and well thought-out assessment will not penalize a student for that; just make them aware of what they need to work on.
Artifact 10:
Teacher Observation Reflection
High School Art Foundation - Mimi Saunders Ms. Saunders is a very energetic and enthusiastic young teacher. Her many hand gestures were effectively used to capture attention and illustrate her points. It was easy to tell that she has a passion for art and cares very much about her students.
What distinguished her from other art teachers I have seen was her balance between commanding discipline and a pleasurable atmosphere. Jokes and laughter were not uncommon in this classroom and Ms. Saunders seemed to use this tactic to keep her students engaged and on task without making them feel uncomfortable.
Her style struck me as very student-focused and relaxed, but with a sense that the teacher was in control over the classroom behavior and activities. She used a loud, low voice to command attention in a very large and open room. If students did not respond to her questions, she would use note cards that she created on each student, which contained their relative interests and work progress.
 Overall, I was impressed with the individual attention Ms. Saunders gave to each student and how she seemed to have a unique connection with each one. It was a fairly large class size and she still made her way around the whole classroom easily, completing her objectives without getting distracted by student questions. Even if she was with one student, you could that tell she was aware of what was happening around her. She seemed very approachable for the students and would sometimes take the time to sit on their desk or next to them and sketch visual examples of her teachings. Her comments on student's work were very specific but yet open enough to give the student a chance to solve the problem on their own. Overall, I was impressed with the individual attention Ms. Saunders gave to each student and how she seemed to have a unique connection with each one. It was a fairly large class size and she still made her way around the whole classroom easily, completing her objectives without getting distracted by student questions. Even if she was with one student, you could that tell she was aware of what was happening around her. She seemed very approachable for the students and would sometimes take the time to sit on their desk or next to them and sketch visual examples of her teachings. Her comments on student's work were very specific but yet open enough to give the student a chance to solve the problem on their own.
View the Soda Can Bug Unit we Co-taught.
Artifact 11:
Recycled Group Sculpture
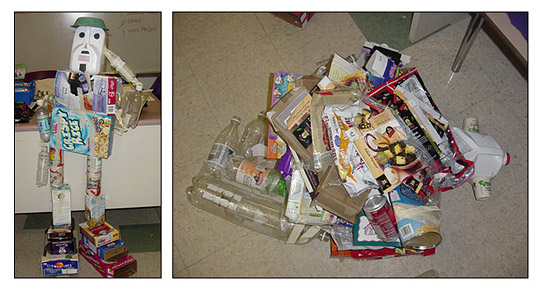
The shining moment of my first summer of teaching was definitely the moment when the class cheered after the healthy sculpture they built finally stood without anyone holding on to it. It was a time of triumph for their work as a group. I believe that it was such an intense moment because of the hard work and obstacles that lead up to that point. It was also a huge relief for all of us that the day was over and that the task was successful. After the way that the project started out, I don't think that anyone in that room that day would have believed that they could come together as a group and be effective. The following briefly describes the project.
Up until that day, we had limited success working as a whole classroom to solve problems. Whether it worked or not, I thought it was necessary to take a risk and do a group classroom project in order to benefit from the process for the future. I was well aware that it had the potential to make or break our summer if the lesson did not go as planned. This was a cooperative lesson that required the whole class to be aware that they would either fail or succeed as a team.
After the first task was completed, with much distress, the turning point was when they evaluated the process and adjusted accordingly. They were able to identify what was working and what they should change. This was a tremendous moment for them and provided them the insight to look back and see where they gained a sense of ownership and took responsibility in order to make necessary decisions. They realized that everyone needed to cooperate in order to succeed and because they were all invested in the same goal, they felt a sense of group accomplishment when they were finished.
Along they way, they also learned some valuable social skills. They were told to elect a construction manager to divide up the tasks. Because of this, they had to overcome competition, criticism and work together in adversity. As a teacher, I also had the opportunity to grow from this experience through the personal evaluation of each student's successes and comments from objective observers. The lesson failed to allow everyone to participate equally. This is something that I would want to change in the future. But as a consequence, there was an unexpected result. It was amazing to watch the roles develop in the group and see the leaders emerge from the followers. A few of the students had a chance for major growth that otherwise might not have had the opportunity to be in that position. It was an eye-opener to see the effect that a teacher's actions could have on student emotions and self-esteem. It left me wondering what trail I would leave behind at the end of my student teaching.
Artifact 12:
Self-Portraits
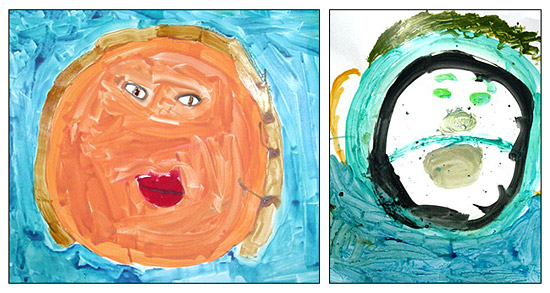
My first experience teaching was in the Live, Learn and Teach program. It was my first taste of having the sole responsibility as a teacher. I was at Dover Middle School and with a diverse group of 4th, 5th and 6th grade students. Here I was introduced to experiential learning and it has shaped my teaching philosophy that I have today. Reflecting on my school experience in my childhood, I remember so much of the information being "force-fed" to me. If I didn't think that I would need that information as an adult, I didn't try to retain it. It wasn't until my college courses in art where I was allowed to explore and learn from my mistakes, that I was able to see my growth as a person. Experiential learning is based on problem solving and learning from experience. That first summer had many challenges and the one that I remember the most is overcoming the language barriers in the classroom.
Communication played a major part in the summer because we had students that possessed a wide range of comprehension skills and personalities. One of our foreign students could barely understand English at all. Some students were very set in their ways and one student was very shy. This was a huge obstacle when organizing group activities that required everyone's equal participation. In order to gain insight into the best method to teach each student, we made a conscious effort to interpret their thoughts through one-on-one conversation and self-expression exercises. During the first week we had them fill out a "personal inventory" worksheet where they revealed their likes and dislikes. As the students were able to get to know each other better, we had them explore their uniqueness by doing self-portraits in a variety of media. During the fourth week, we took a risk when we taught them the meaning of constructive criticism. We then let them critique some of each other's work. During the critique we saw the classroom start to identify and appreciate each persons differences and value their own ideas. As teachers, we started to see each student's potential and made efforts to maximize their strengths each day.
The self-portrait project was the first time that I had an opportunity to do any studio arts with a group of students. The impact it had on my will last a lifetime. The diversity of each student's background, interests and personality came out in their work. I realized the power that art had on both the artist and the viewer. I knew then that the lessons I would plan for my art classroom, would be lessons that would not all come out looking alike. I wanted to get to know my students and the best way was through their artwork. We hung all the portraits in the hallway and discussed how each person interpreted themselves differently. The level of acceptance for abstract design was different for each student. Some could not accept when their paint ran into another color or they thought they made a "mistake." I vowed that as an art teacher, one of my objectives would be to help students realize that mistakes are OK, and sometimes in art it is the things we don't plan that are the most interesting. |